Products Details
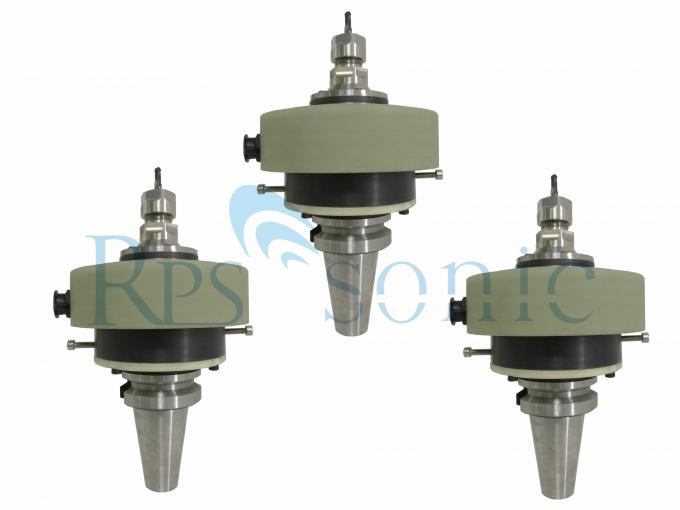
Aluminum Alloy Ultrasonic Machining Tool High Strength Long Life Span
Description | Frequency: | 20khz | Power: | 1000W |
| Amplitude: | 15~50um | Gap Overcut: | 0.02-0.1 |
| High Light: | rotary ultrasonic machining , ultrasonic assisted drilling |
ultrasonic turning Equiment Imposition of ultrasonic vibration Parameter
| Item | Parameter |
| Abrasive | Boron carbide, aluminium oxide and silicon carbide |
| Grit size(d0) | 100 – 800 |
| Frequency of vibration (f) | 19 – 25 kHz |
| Amplitude of vibration (a) | 15 - 50 µm |
| Tool material | Soft steel titanium alloy |
| Wear ratio | Tungsten 1.5:1 and glass 100:1 |
| Gap overcut | 0.02-0.1 mm |
Imposition of ultrasonic vibration changes radically the geometric structure of the resulting surface. Fig. 3-a, b show photographs of the surfaces of hardened steel work-pieces treated by ENGINEERING FOR RURAL DEVELOPMENT Jelgava, 25.-27.05.2016. 220 traditional (right pieces) and ultrasonic turning (left fragments) at the cutting speeds of 10 m·min-1 (a) and 60 m·min-1 (b), and 0.05 mm·rev-1. A radical difference in the quality of the surfaces is obvious. The surface obtained by ultrasonic turning has a strictly regular structure. This is confirmed by the surface profilogram (Fig. 3-c), which right part has been obtained by traditional turning with the left part – by ultrasonic turning. Recurrent troughs with the feed steps of 0.05 mm, which can be observed in both parts of the profilogram, represent a trace of the top of the cutter. In Fig. 3-b a segment of ultrasonic turning demonstrates periodic turning prints due to the periodic (with the frequency of 20 kHz) interactions between the tool and the work-piece. Also, such prints, if enlarged, are observed on the surface (Fig. 3-a), but here they are not visible as their step is much less due to the low cutting speed.  Fig. 3. Hardened steel: a, b – treated surfaces; c – example of profilogram Such difference in the cutting results is caused by the change of the cutting regime. In traditional cutting under the continuous interaction between the tool and the work-piece, the plastic deformation zone is located in the vicinity of the cutting edges and propagates with the cutting speed. This zone is full of micro-cracks, distributed randomly. As a result, the surface has irregular distribution of microroughness. Ultrasonic cutting is the result of periodic micro impacts, succeeding with a high frequency. Because of the high repetition frequency and the short period of pulses the plastic deformation zone is concentrated in a small neighborhood of the top of the tool, and the zone is not saturated with microcracks that do not have time to grow. Therefore, a track of the cutter on the surface of the work-piece illustrates factually an imprint of its shape, as shown in Fig. 3-b.

Ultrasonic Herb Extract Machine,
vcx 750 ultrasonic processor,
ultrasonic pcb board,
Ultrasonic Nebulizer,
15Khz ultrasonic transducer,
China Impedance Analyzer and Measuring Instrument,
ultrasonic glass cutting,
Ultrasonic Food Cutting,
Ultrasonic atomization equipment,
Graphene spraying,
 Fig. 3. Hardened steel: a, b – treated surfaces; c – example of profilogram Such difference in the cutting results is caused by the change of the cutting regime. In traditional cutting under the continuous interaction between the tool and the work-piece, the plastic deformation zone is located in the vicinity of the cutting edges and propagates with the cutting speed. This zone is full of micro-cracks, distributed randomly. As a result, the surface has irregular distribution of microroughness. Ultrasonic cutting is the result of periodic micro impacts, succeeding with a high frequency. Because of the high repetition frequency and the short period of pulses the plastic deformation zone is concentrated in a small neighborhood of the top of the tool, and the zone is not saturated with microcracks that do not have time to grow. Therefore, a track of the cutter on the surface of the work-piece illustrates factually an imprint of its shape, as shown in Fig. 3-b.